Table of Contents
Self-hosting a mail server can be a great learning experience. I recently set up an email server using Docker Mail-Server and I ran into an issue with outgoing mail where my public IP was on a policy blocklist. This caused almost all of my outgoing emails to be blocked. If you are faced with this problem, there are two directions you can go. You can sign up for an SMTP service, some are even free up to a certain number of emails, or you can run a postfix relay in a VPS. I like to have control of the underlying infrastructure, so I went with the latter. This guide will walk you through how to configure the Postfix relay server on the VPS so that it only accepts mail from your mail server's IP or from a server with a certificate that matches your mail server's hostname.
Setting up the VPS
There are many options for Virtual Private Servers but for purposes of a postfix SMTP only relay, ramhost.us cannot be beat. I got a simple 2-core 8GB ram VPS for $15 per year.
- Purchase the VPS service and setup your operating system. This step will vary based on what VPS service you went with. For purposes of this guide, we will be using Debian 12 as our operating system.
- SSH or console into your VPS and run the following commands to update your repos and install any pending updates
$ sudo apt update
$ sudo apt upgrade
Note: If you get an error that the sudo command does not exist, simply remove sudo from the two preceding commands and then run the following after running them without sudo...
$ apt install sudo - Install nano. This will come in handy later.
$ sudo apt install nano
Install and configure ufw - firewall
- Install UFW with the following command
$ sudo apt install ufw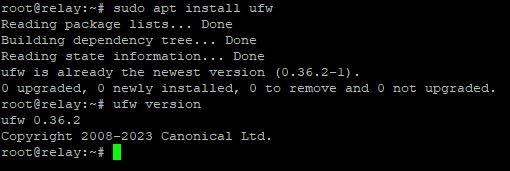
- Configure UFW to allow ssh access. Simply type the following command...
$ sudo ufw allow ssh-
Optional advanced firewall customization is possible with UFW. You can lock down SSH access to a specific IP or subnet. For SSH over a nonstandard port (Port 1831 in this case), try the following command...
$ sudo ufw allow 1831/tcp -
For SSH access only from a specific IP address, you may use the following...
$ sudo ufw allow proto tcp from 102.1.2.2 to any port 22 - In this example, you are connecting to the VPS from a public IP of 102.1.2.2 . You could also substitute a subnet in CIDR notation for the connecting IP.
-
- Add SMTP and postfix submission ports to the UFW firewall. You may do this with the following commands...
$ sudo ufw allow 25,465,587/tcp $ sudo ufw allow 'Postfix Submission' - Verify your ufw rules with the following...
$ sudo ufw show addedImportant: Verify your SSH rules are correct at this point or you could lock yourself out in the next step

- Enable the firewall
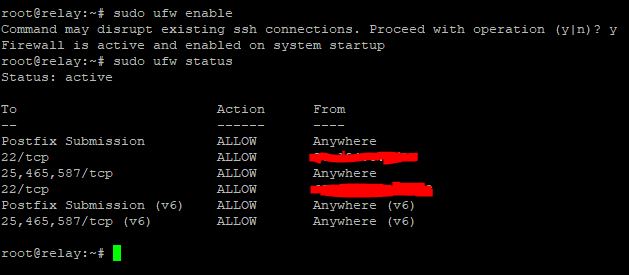
$ sudo ufw enable $ sudo ufw status -
Verify the rules look correct
-
Great! Your firewall settings are configured.
Configure Static IP and Hostname
Configuring a static IP is very important as you don't want the IP address of your relay server to change. That could lead to all sorts of problems and outgoing mail no longer being delivered. Follow these steps to configure a static IP...
- Run the following command to edit the network connection settings
$ sudo nano /etc/network/interfaces - Edit the file to look like the following (You will need to get your IP, Netmask, and gateway from your VPS provider)
# This file describes the network interfaces available on your system
# and how to activate them. For more information, see interfaces(5).

source /etc/network/interfaces.d/*

# The loopback network interface
auto lo
iface lo inet loopback

# The primary network interface
auto ens3
iface ens3 inet static
address XXX.XXX.XXX.XXX
netmask 255.255.255.0
gateway XXX.XXX.XXX.XXX
dns-nameservers 1.1.1.1 8.8.8.8
Don't change the primary interface name to match ens3, leave it as it is. Simply change the inet dhcp to inet static
- Restart the network connection for the changes to take effect (change ens3 to match your primary network interface name)
$ sudo systemctl restart ifup@ens3 - Run ip address to verify it was set successfully
$ ip address 1: lo: <LOOPBACK,UP,LOWER_UP> mtu 65536 qdisc noqueue state UNKNOWN group default qlen 1000 link/loopback 00:00:00:00:00:00 brd 00:00:00:00:00:00 inet 127.0.0.1/8 scope host lo valid_lft forever preferred_lft forever inet6 ::1/128 scope host noprefixroute valid_lft forever preferred_lft forever 2: ens3: <BROADCAST,MULTICAST,UP,LOWER_UP> mtu 1500 qdisc fq_codel state UP group default qlen 1000 link/ether aa:a5:08:da:28:26 brd ff:ff:ff:ff:ff:ff altname enp0s3 inet XXX.XXX.XXX.XXX/24 brd XXX.XXX.XXX.XXX scope global ens3 valid_lft forever preferred_lft forever inet6 XXXX::XXXX:XXX:XXXX:XXXX/64 scope link valid_lft forever preferred_lft forever - Now set a hostname for your server. I chose relay. Make sure to use the static public IP you configured earlier in the hosts file.
$ sudo nano /etc/hostname
$ sudo nano /etc/hosts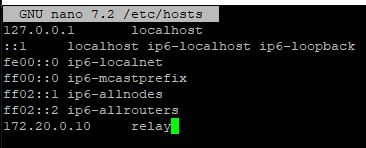
- Finally reboot the system for your changes to take effect.
$ sudo reboot
Postfix
Install Postfix
- Now it's time to install Postfix. Run the following command...
$ sudo apt install postfix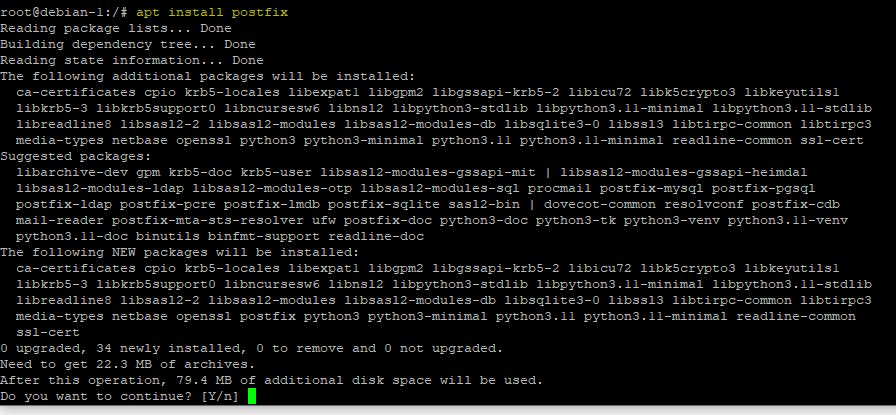
- Press Y and hit enter to continue the install
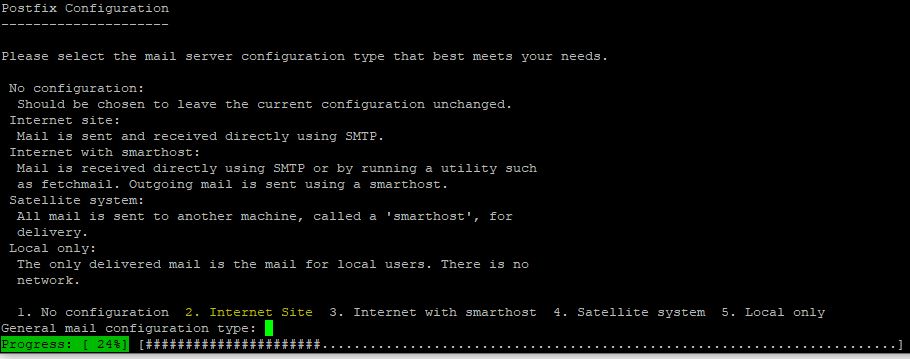
- At the server configuration screen, type 2 for Internet Site and press enter

- For the system mail name, use your FQDN. I used tictactech.net
- Great! The Postfix install should complete successfully.
Configure Postfix to be an SMTP Relay
The main file to use for postfix configuration is located in /etc/postfix/main.cf. This is where you will add your configuration changes. The file should already exist with a default configuration. Run the following command to open it in nano...
$ sudo nano /etc/postfix/main.cfHere's what the default config should look like...
# See /usr/share/postfix/main.cf.dist for a commented, more complete version


# Debian specific:  Specifying a file name will cause the first
# line of that file to be used as the name.  The Debian default
# is /etc/mailname.
#myorigin = /etc/mailname

smtpd_banner = $myhostname ESMTP $mail_name (Debian/GNU)
biff = no

# appending .domain is the MUA's job.
append_dot_mydomain = no

# Uncomment the next line to generate "delayed mail" warnings
#delay_warning_time = 4h

readme_directory = no

# See http://www.postfix.org/COMPATIBILITY_README.html -- default to 3.6 on
# fresh installs.
compatibility_level = 3.6


# TLS parameters
smtpd_tls_cert_file=/etc/ssl/certs/ssl-cert-snakeoil.pem
smtpd_tls_key_file=/etc/ssl/private/ssl-cert-snakeoil.key
smtpd_tls_security_level=may

smtp_tls_CApath=/etc/ssl/certs
smtp_tls_security_level=may
smtp_tls_session_cache_database = btree:${data_directory}/smtp_scache


smtpd_relay_restrictions = permit_mynetworks permit_sasl_authenticated defer_unauth_destination
myhostname = debian-1
alias_maps = hash:/etc/aliases
alias_database = hash:/etc/aliases
myorigin = /etc/mailname
mydestination = $myhostname, tictactech.net, debian-1, localhost.localdomain, localhost
relayhost =
mynetworks = 127.0.0.0/8 [::ffff:127.0.0.0]/104 [::1]/128
mailbox_size_limit = 0
recipient_delimiter = +
inet_interfaces = all
inet_protocols = all
There are two paths you can go from here...
Only accept mail from a specific public IP or only accept mail from a specific hostname with a verified certificate.
Only Accept Mail from IP Address
- Once again, open the main.cf file with nano
$ sudo nano /etc/postfix/main.cf - Edit the file to look the following... (changes outlined below)
# See /usr/share/postfix/main.cf.dist for a commented, more complete version


# Debian specific:  Specifying a file name will cause the first
# line of that file to be used as the name.  The Debian default
# is /etc/mailname.

smtpd_banner = $myhostname ESMTP $mail_name (Debian/GNU)
biff = no

# appending .domain is the MUA's job.
append_dot_mydomain = no

# Uncomment the next line to generate "delayed mail" warnings
#delay_warning_time = 4h

readme_directory = no

# See http://www.postfix.org/COMPATIBILITY_README.html -- default to 3.6 on
# fresh installs.
compatibility_level = 3.6
maillog_file = /var/log/postfix.log

# TLS parameters
smtpd_tls_cert_file=/etc/ssl/certs/ssl-cert-snakeoil.pem
smtpd_tls_key_file=/etc/ssl/private/ssl-cert-snakeoil.key
smtpd_tls_security_level=may


smtp_tls_CApath=/etc/ssl/certs
smtp_tls_security_level=may
smtp_tls_session_cache_database = btree:${data_directory}/smtp_scache


smtpd_relay_restrictions = permit_mynetworks reject_unauth_destination
myhostname = relay.tictactech.net
alias_maps = hash:/etc/aliases
alias_database = hash:/etc/aliases
myorigin = /etc/mailname
mydestination =
transport_maps = hash:/etc/postfix/transport
relayhost =
mynetworks = 127.0.0.0/8 [::ffff:127.0.0.0]/104 [::1]/128 YOUR_PUBLIC_IP
mailbox_size_limit = 0
recipient_delimiter = +
inet_interfaces = all
inet_protocols = all
Line 22 - add "maillog_file = /var/log/postfix.log"
Line 35 - remove "permit_sasl_authenticated"
Line 36 - verify myhostname is correct and if not, change it
Line 40 - Remove all entries here leaving only "mydestination = " This tells your mail server that it doesn't have any mailboxes of its own. It only works as a relay.
Line 43 - Add your actual public IP address or a CIDR formatted subnet after the [::1]/128 - Reload the postfix mail system...
$ sudo postfix reload - That's it! The postfix server should be accepting emails for relay from your IP address. You still need to configure a few more things like DNS, reverse DNS, & SPF. Feel free to skip the next section as it is about using a certificate to verify the client and not necessary if you are verifying by IP address.
Only Accept Mail from Host with Specific Certificate
- This config is a little trickier. You will need to copy the SSL/TLS certificate that your mail server is using to send email to the relay server. I copied the file from a windows machine to the Debian 12 machine using putty and pscp.
- In your putty/ssh terminal, Run the following commands...
$ sudo mkdir /etc/ssl/
$ sudo chown USERNAME /etc/ssl
This will create a directory called ssl in the etc folder and make your username the owner. Obviously substitute your real username for USERNAME
- While still connected to the putty session, open an admin command prompt. Make sure the C:\ssl\ directory contains all the relevant cert files, including the private .key file. Then run the following command to copy the files...
pscp -r C:\ssl awellington@relay:/etc -
Input your password and the command should complete successfully

- In your putty/ssh terminal, Run the following commands...
- Now open up the main.cf and edit it with nano
$ sudo nano /etc/postfix/main.cf - Edit the file to look like the following...
# See /usr/share/postfix/main.cf.dist for a commented, more complete version


# Debian specific:  Specifying a file name will cause the first
# line of that file to be used as the name.  The Debian default
# is /etc/mailname.

smtpd_banner = $myhostname ESMTP $mail_name (Debian/GNU)
biff = no

# appending .domain is the MUA's job.
append_dot_mydomain = no

# Uncomment the next line to generate "delayed mail" warnings
#delay_warning_time = 4h

readme_directory = no

# See http://www.postfix.org/COMPATIBILITY_README.html -- default to 3.6 on
# fresh installs.
compatibility_level = 3.6
maillog_file = /var/log/postfix.log

# TLS parameters
smtpd_tls_cert_file=/etc/ssl/fullchain.cer
smtpd_tls_key_file=/etc/ssl/tictactech.net.key
smtpd_tls_security_level=encrypt
smtpd_tls_req_ccert=yes
smtpd_tls_CApath = /etc/ssl/certs

smtp_tls_CApath=/etc/ssl/certs
smtp_tls_security_level=may
smtp_tls_session_cache_database = btree:${data_directory}/smtp_scache


smtpd_relay_restrictions = permit_mynetworks permit_tls_clientcerts reject_unauth_destination
relay_clientcerts = hash:/etc/postfix/relay_clientcerts
myhostname = relay.tictactech.net
alias_maps = hash:/etc/aliases
alias_database = hash:/etc/aliases
myorigin = /etc/mailname
mydestination =
transport_maps = hash:/etc/postfix/transport
relayhost =
mynetworks = 127.0.0.0/8 [::ffff:127.0.0.0]/104 [::1]/128
mailbox_size_limit = 0
recipient_delimiter = +
inet_interfaces = all
inet_protocols = all
Line 22 - add "maillog_file = /var/log/postfix.log"
Lines 25 through 29 - Remove all the smtpd options and replace them with what you see above. Make sure to put the correct paths to the private key and cert file.
Line 36 - remove "permit_sasl_authenticated" and add "permit_tls_clientcerts"
Line 37 - Add "relay_clientcerts = hash:/etc/postfix/relay_clientcerts"
Line 38 - verify myhostname is correct and if not, change it
Line 40 - Remove all entries here leaving only "mydestination = " This tells your mail server that it doesn't have any mailboxes of its own. It only works as a relay.The smtpd_tls_CApath points to your trusted CA store. The root CA and intermediate CA that signed your cert should be here. If you are using a cert from a common CA like LetsEncrypt or Sectigo, they should be here by default.
- Still with me? The final part is to extract the thumbprint from the cert and put it in /etc/postfix/relay_clientcerts
- Run the following command from within the directory where your certificate was copied in the previous step
$ openssl x509 -noout -fingerprint -sha256 -inform pem -in fullchain.cer
- Copy the SHA256 fingerprint starting right after the equals sign. Just a side note, this is the public portion of the certificate.
- Run the following command to edit the relay_clientcerts file...
$ sudo nano /etc/postfix/relay_clientcerts - Add the fingerprint first, then a space, then the hostname of your main mail server and save.
#GNU nano 7.2 /etc/postfix/relay_clientcerts F6:43:21:81:8F:B2:33:02:24:5A:96:2D:56:59:AE:D4:B0:77:65:6A:80:6E:A0:1F:19:97:FF:C1:47:FD:57:85 mail.example.com - Run the following commands to format the relay_clientcerts file and reload postfix
$ sudo postmap /etc/postfix/relay_clientcerts
$ sudo postfix reload
- Run the following command from within the directory where your certificate was copied in the previous step
- Thats it! Your relay should now accept mail from any client that presents that specific certificate with that hostname.
Configure DNS, Reverse DNS, SPF, and Testing
- There are a few more hoops to jump through to make sure your emails that are being relayed will get delivered to inboxes. First you will want to add a DNS A record for your relay. It should look like the following...
Type Name IPv4 address A relay RELAY PUBLIC IP - You also need to add your relay IP to your main mail server so that it knows to route all mail through the relay. If you are using Docker Mail-Server, you do that in the mailserver.env file like this...
# ----------------------------------------------- # --- Default Relay Host Section ---------------- # ----------------------------------------------- # Setup relaying all mail through a default relay host # # empty => don't configure default relay host # default host and optional port to relay all mail through DEFAULT_RELAY_HOST=RELAY PUBLIC IP - Configuring Reverse DNS requires the cooperation of your VPS host. It is usually a simple request so all you need to do is send an email/ticket to your hosting provider requesting that they add a RDNS entry. The request should be in the following form...
The reverse dns should be 104.249.181.199.in-addr.arpa pointing to relay.tictactech.net
- Lastly, you should add your relay public IP to your SPF record. There is plenty of documentation on how to do this online so I will simply link another guide here on configuring SPF.
Build SPF record - Finally, test your SMTP relay! You can use mxtoolbox to verify your SMTP relay is working correctly and is not allowing anyone else to relay mail through it. You can also monitor the relay's mail logs with the following command...
$ sudo tail -f /var/log/postfix.logConclusion
Phew! That was a long one. Hopefully everything worked correctly for you. Self-hosting email is always a challenge but also a great learning experience. We set up Debian 12 on a VPS, configured firewall rules using ufw, configured a static IP, and installed & configured postfix to act as an SMTP relay using two different methods of authentication. We also went over configuring a DNS and reverse DNS record for the relay as well as adding the relay IP to your SPF record.

